Gear & profiles
PxlMonk keeps a catalog of your gear and lets you apply profiles — camera colour profiles, LUTs and lens corrections — to your photos.
Your gear catalog
Section titled “Your gear catalog”Open Settings → Gear to manage the makers and products you use — cameras, lenses and film stocks. This pick-list is mainly used to tag analog scans (where the gear isn’t in the file’s EXIF), and it’s shared across all your libraries.
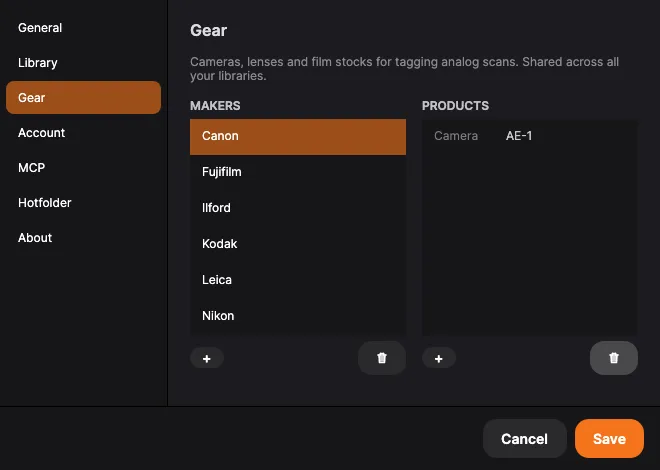
Add a maker or product with the + buttons, rename or edit by double-clicking, and remove with the trash button. New gear you use is also added automatically as you import.
Camera profiles
Section titled “Camera profiles”A camera profile (a DNG/DCP profile) applies a camera-specific colour look. In the Develop tab, pick a Camera profile — None, the image’s Embedded profile, or one from your library — and adjust its strength. The profile applies the DCP look (hue/saturation and look tables); use Manage camera profiles to add DCP files to your library.
Apply a LUT (colour lookup table) as a creative look from the Develop panel, and dial it
in with the amount slider. You can also bake a LUT from the current edit, and use
Manage LUTs to import your own (.cube / .3dl).
Lens corrections
Section titled “Lens corrections”Switch the Lens section on — the switch in its header — to fix distortion, vignetting and chromatic aberration. Pick the taking lens (maker → lens); for scans you can also set the digitization lens used to copy the film. How far each of the three corrections is taken sits under Advanced in the same card.
Where the correction data comes from
Section titled “Where the correction data comes from”Some files describe their own lens. Sony ARW files carry the manufacturer’s own distortion, vignetting and chromatic-aberration figures, as do DNGs written by Leica, Ricoh and DJI cameras and anything put through the Adobe DNG Converter. Those are used first, because they exist for lenses no profile database has — many compact and mirrorless lenses are even designed on the assumption that the correction will be applied.
When a file carries its own figures, a Correction data dropdown appears with three settings:
- Automatic — use what the file says, and fall back to a lens profile if it says nothing. A line underneath tells you which one is actually in use.
- From the file — always the file’s own figures, never a profile.
- Lens profile — always a Lensfun profile, so you can compare the two.
Files without their own figures simply use a Lensfun profile, and no dropdown appears. On a film scan the file’s figures only ever describe the digitization lens — the camera or scanner that copied the negative. The lens that took the original photograph left no trace in that file, so it always comes from a profile.
When nothing can supply the correction. The section can be switched on, with all three ticks set, and still change nothing: no lens picked, or one no profile database knows, on a file that says nothing about its own lens. PxlMonk now tells you so under the dropdown, instead of leaving you to notice that the picture is unchanged. Pick a lens under Settings → Gear, or switch the section off.
Chromatic aberration does not need a profile at all. When neither the file nor a profile can supply it, PxlMonk measures it from the photograph itself: it finds where red and blue were recorded at a slightly different size than green and puts them back. There is nothing to switch on — it happens whenever lens correction is on and nothing else could supply the figure, and the amount slider works on it exactly as it does on a profile. Where a photograph has too little detail to measure, or where the channels already line up, it leaves the picture alone. This is the size kind of fringing; the depth kind is what Purple and Green are for, below.
How far each correction goes
Section titled “How far each correction goes”Under each correction is an amount, from 0 to 200 %. At 100 % the correction is exactly what the profile or the file measured — that is the default and usually what you want. Lower it to keep some of the lens’s character, or raise it when a manufacturer has been conservative. It works the same way for every source and for all three corrections: at 50 % a pixel moves half as far and a corner is lifted half as much.
Colour fringes
Section titled “Colour fringes”Purple and Green under the lens group remove the coloured fringes along high-contrast edges — the violet halo on a bare branch against a bright sky, and the green counter-fringe on the other side of the same edge. These work without a lens profile, and they fix something the profile cannot: the profile corrects fringing caused by the colours landing at slightly different sizes, while what is left over comes from colours focusing at different depths. That one cannot be moved back into place, only taken out as colour.
Both sliders only act where three things are true at once: the colour is in range, it sits on a strong edge, and it stands out from its surroundings. That last condition is why purple flowers and green foliage keep their colour — there, the surroundings are the same colour, so nothing stands out.
Next steps
Section titled “Next steps”- White balance & tone — where profiles and LUTs are applied.
- Analog film development — where gear tagging matters most.