Tethered shooting
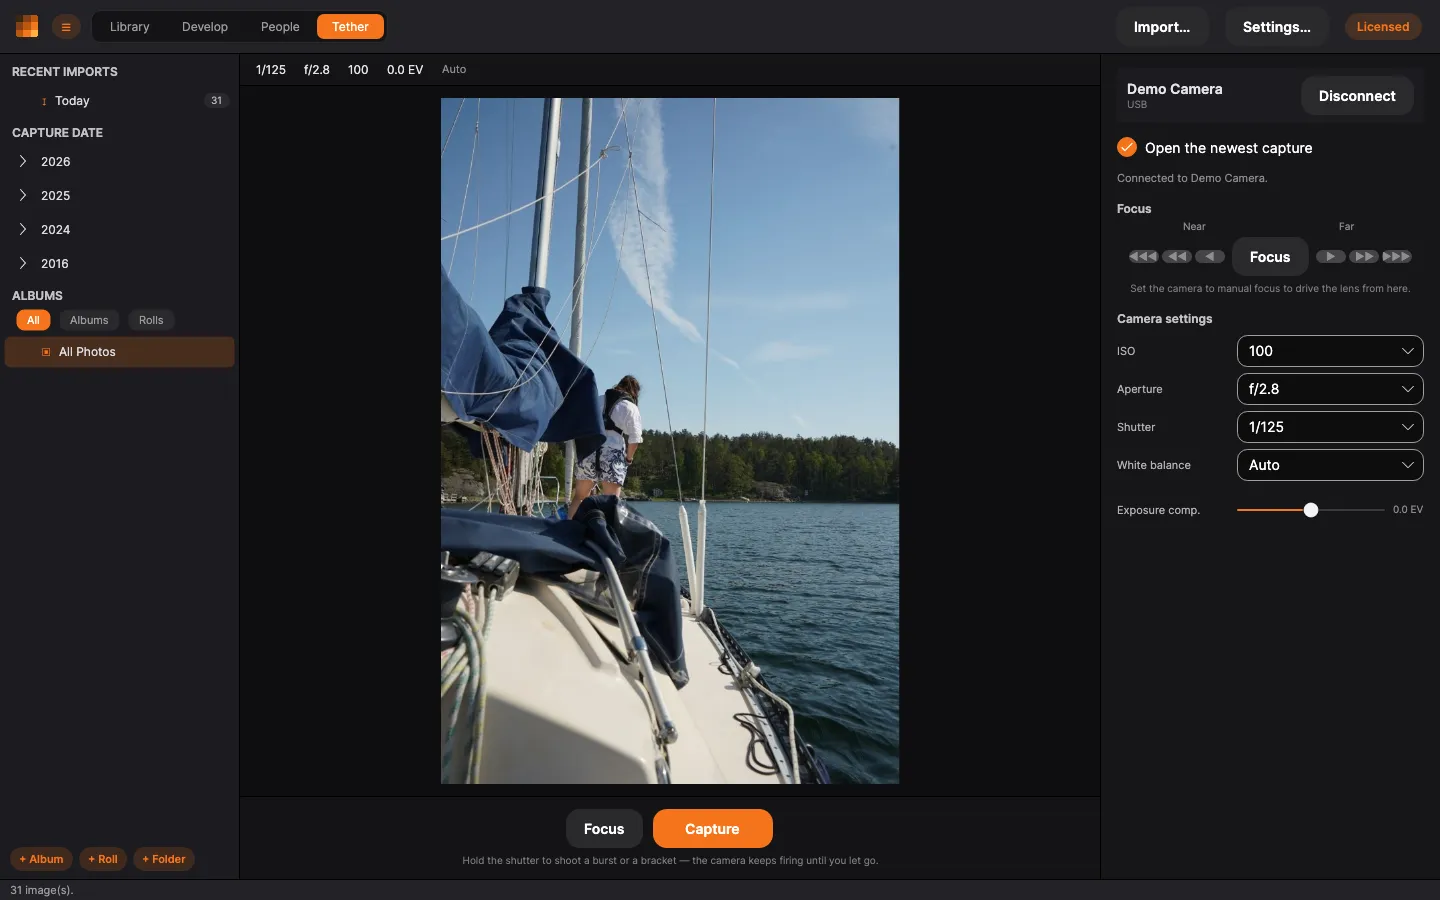
Connect a camera by cable and PxlMonk shows its live view, its settings and its shutter — and every frame you take lands in the current library straight away. Open it with the Tether tab.
This page covers what tethering does whatever camera you use. What your particular brand needs is on its own page: Canon cameras, Nikon cameras and Sony cameras.
Connect
Section titled “Connect”Pick your camera from the list and press Connect. If it isn’t listed, press Refresh — and check the camera is switched on and in the right USB mode (see your brand’s page).
Once connected the picker gives way to the camera’s name and a Disconnect button, so the sidebar shows either what you can connect to, or what you are connected to.
Live view
Section titled “Live view”The live view runs while the camera is connected. It is the camera’s own preview, so what it shows — depth of field, exposure, a focus magnifier — is whatever the camera is showing on its own screen. Some cameras stop the preview while they are writing a photo; that pause is theirs, not PxlMonk’s.
Camera settings
Section titled “Camera settings”The settings panel is the camera’s, not ours. Every row you see is a setting that particular body reports: ISO, aperture, shutter, white balance, drive mode, and so on. A body that doesn’t have a setting simply doesn’t show the row.
A greyed-out row means the camera says no, right now. Cameras hand a setting over or keep it for themselves depending on what else is set, and PxlMonk follows rather than argues:
- A physical dial wins. If a setting has its own wheel on the body, that wheel owns it — turn the exposure compensation dial off zero and the row greys out, because the dial is the answer. The same goes for a mode dial.
- The mode decides. In aperture priority the camera picks the shutter speed, so the shutter row is a readout. Switch to manual and it comes back.
So a row that won’t budge is usually the camera telling you something true. If you want it in PxlMonk, hand it back on the body.
Taking a picture
Section titled “Taking a picture”Press Capture for a single frame.
For a burst or a bracket, hold the button down. The camera keeps firing until you let go — a quick click gives you one frame, whatever the drive mode says. That is the camera’s own behaviour under a thumb, and it is the same here.
Frames arrive in the library as they are taken. Turn on Open the newest capture and each one opens as it lands, so the photo you just took is the photo on screen.
The focus panel drives the lens: Focus runs the camera’s autofocus, and the arrows either side step the focus motor nearer or further, in three sizes.
The motor buttons only work while the camera has handed the lens over — on most bodies, in manual focus. In autofocus the camera owns the lens and the buttons are inactive.
Where the photos go
Section titled “Where the photos go”Captures are saved into the folder shown in the panel and imported into the current library. Whether the camera also keeps a copy on its own card is a camera setting — see your brand’s page.
Disconnect
Section titled “Disconnect”Press Disconnect, or just close PxlMonk. Either way the camera is released cleanly and goes back to normal.