Developing your photos
Double-click a photo, or select it and switch to the Develop tab, to open the editor. The photo fills the centre; the histogram and the editing panels are on the right; the filmstrip along the bottom lets you move between photos.
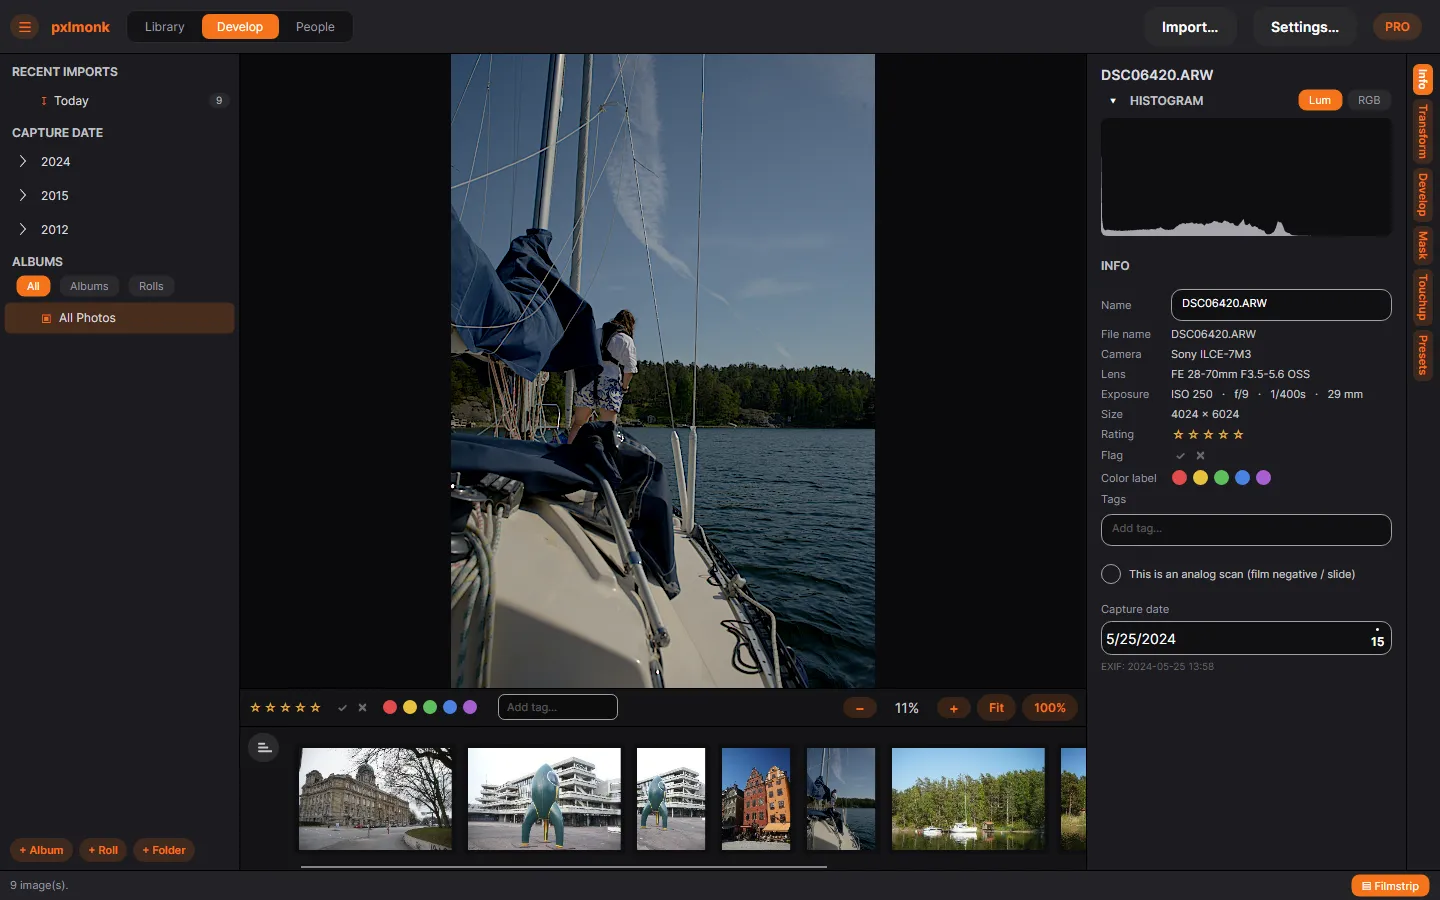
The Develop tabs
Section titled “The Develop tabs”The vertical rail on the right switches between editing tools:
- Info — metadata and triage (see below).
- Transform — crop, straighten, correct perspective, rotate and flip.
- Develop — the main adjustments: white balance, tone, colour, detail and effects.
- Mask — edit selected regions independently.
- Touchup — heal, clone and remove dust or spots.
- Presets — save and apply looks.
The Info panel
Section titled “The Info panel”The Info tab shows the shot’s metadata and lets you triage it:
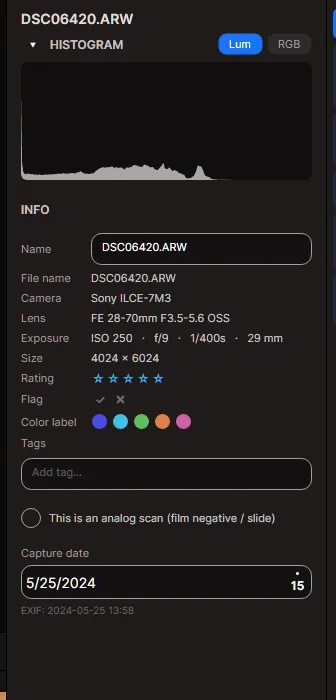
At the top is the histogram (toggle between luminosity and RGB). Below it:
- Camera, Lens and Exposure read from the file’s EXIF.
- Rating, Flag, Color label and Tags — the same triage you can do in the Library, kept in sync.
- This is an analog scan — turn this on for film scans to unlock the Film workflow and relabel the camera/lens rows as the scanning rig.
- Capture date — corrected here if needed; reset to the EXIF value with one click.
Next steps
Section titled “Next steps”- White balance & tone — your first real adjustments.