Getting started
pxlmonk is a RAW photo developer that opens your shots upright and colour-correct out of the box, with a dedicated workflow for analog film scans. This guide takes you from install to your first imported photos.
Install
Section titled “Install”pxlmonk runs on Windows, macOS and Linux:
- Windows — install from the Microsoft Store.
- macOS — download the
.dmgfrom pxlmonk.com and drag the app to Applications. - Linux — download the AppImage from the website, or install the Flatpak from Flathub.
Create your library
Section titled “Create your library”The first time you launch pxlmonk, the setup wizard asks how you want it to manage your photos. Choose the model that fits how you work:
-
Managed library — pxlmonk copies imported files into a folder structure it owns (organised by a date template you choose). Best if you want one tidy, self-contained photo library.
-
Referenced library — pxlmonk indexes your files in place and never moves them. Best if you already have a folder structure you want to keep.
Import your first photos
Section titled “Import your first photos”Click Import… in the top bar, pick a folder of RAW files (pxlmonk supports the major camera RAW formats), review the files it found, and confirm. Your photos appear in the Library.
pxlmonk decodes RAW files upright — orientation is normalised to the EXIF value, so shots appear the right way up with no manual rotation.
Find your way around
Section titled “Find your way around”pxlmonk is organised into three modes, switched from the tabs at the top:
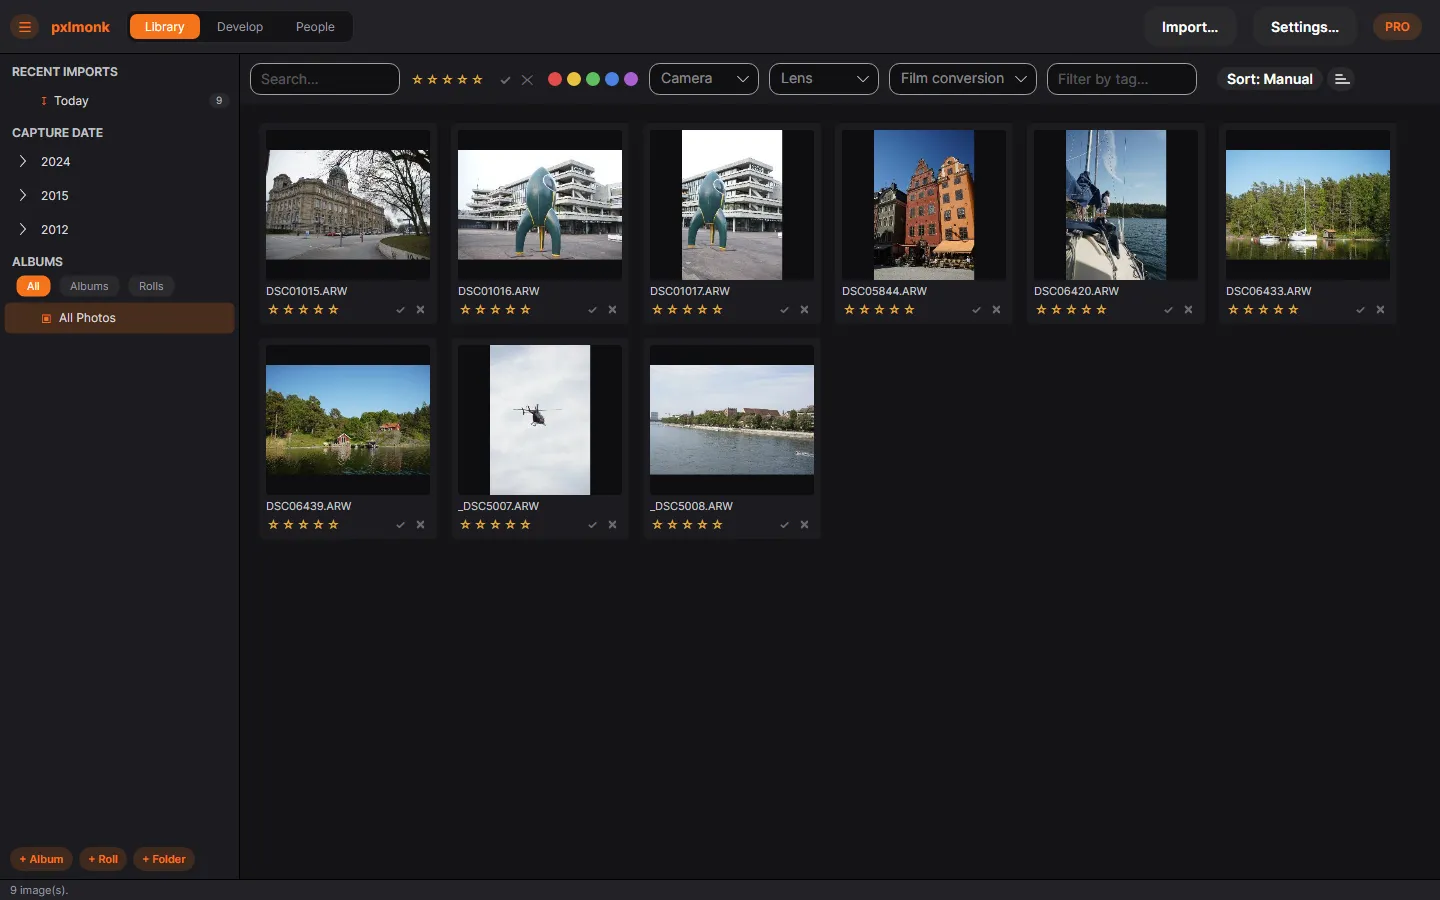
- Library — browse, rate and organise your photos (shown above).
- Develop — edit a single photo: crop, tone, colour, masks, retouching and more.
- People — group photos by the faces that appear in them.
Next steps
Section titled “Next steps”- Organizing your library — rate, flag, tag and group your photos.
- Developing your photos — the editor, tab by tab.
- White balance & tone — your first adjustments.
- Exporting — save finished photos as JPEG or TIFF.