Analog film development
pxlmonk has a dedicated workflow for scanned film: it inverts negatives, removes the orange film base, and gives you film-specific tone controls — all non-destructively.
Mark the photo as a scan
Section titled “Mark the photo as a scan”First, in the Info panel, turn on This is an analog scan (film negative / slide). That unlocks the Film tab in the right-hand rail and relabels the camera/lens rows as your scanning rig.
Convert the scan
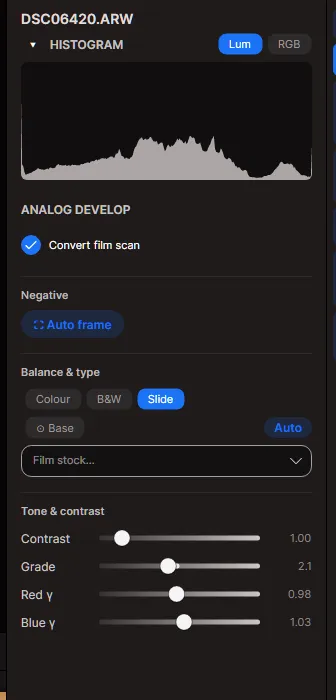
Section titled “Convert the scan”Open the Film tab and turn on Convert film scan. pxlmonk inverts the image and balances it. Then set the type of original:
- Colour — a colour negative.
- B&W — a black-and-white negative.
- Slide — a positive slide (no inversion).
Use Auto frame to detect and crop to the film frame, and Base (with Auto balance) to sample and neutralise the orange film base.
Fine-tune the look
Section titled “Fine-tune the look”Under the film tone controls, shape the result:
- Contrast and Grade — overall contrast and the tone grade.
- Red γ / Blue γ — per-channel gamma to correct colour crossover.
- Pick a Film stock to emulate a particular film’s response.
Next steps
Section titled “Next steps”- White balance & tone — further adjustments after conversion.
- Exporting — save the finished positive.