Developing your photos
Double-click a photo, or select it and switch to the Develop tab, to open the editor. The photo fills the centre; the histogram and the editing panels are on the right; the filmstrip along the bottom lets you move between photos.
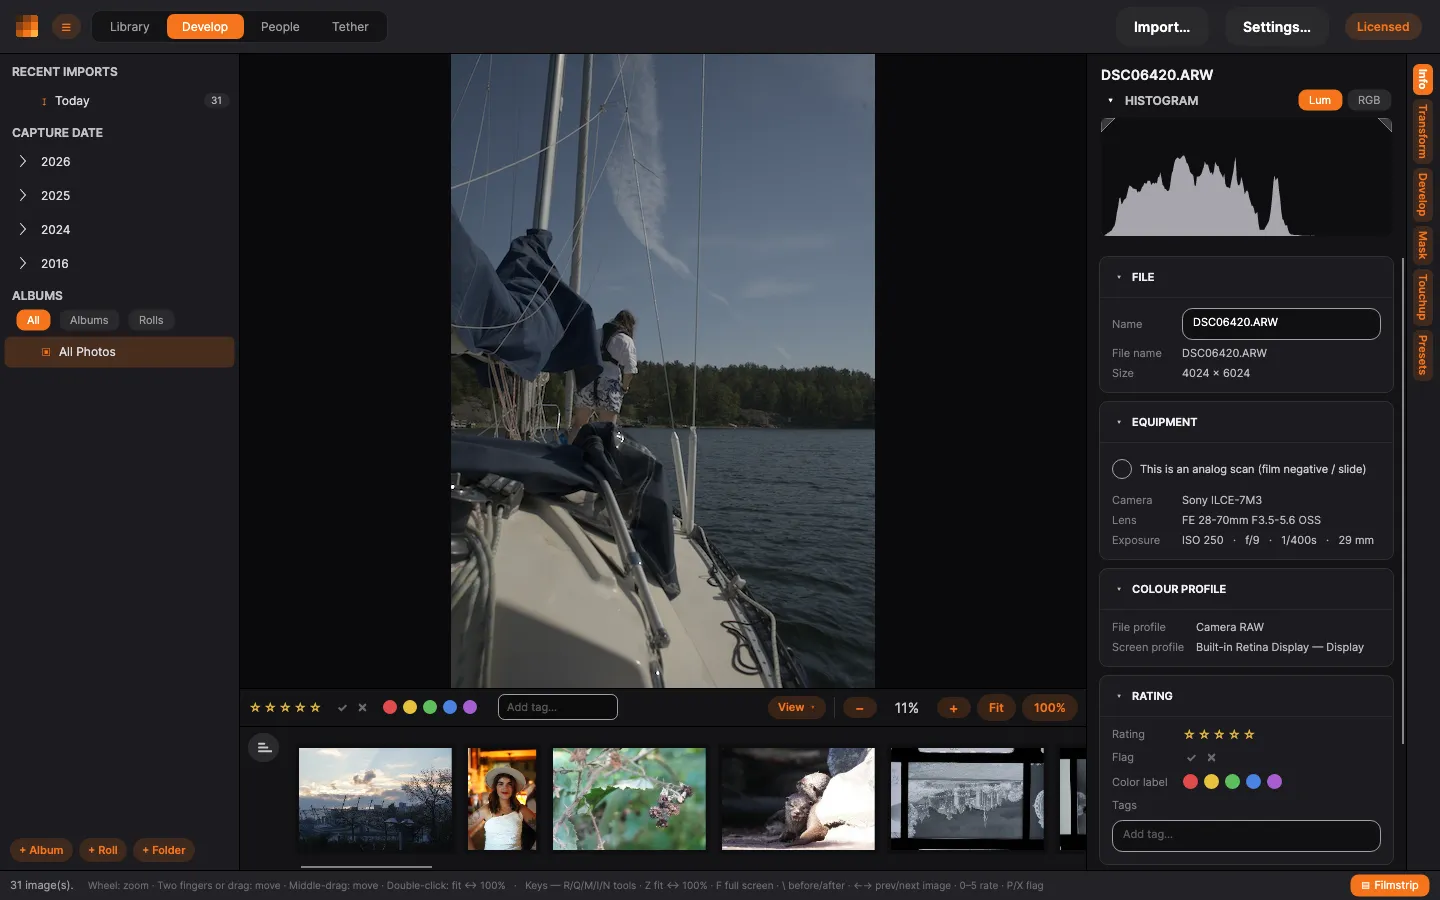
The Info, Transform, Film, Mask, Touchup and Presets panels are laid out the same way as the Develop panel — each group of settings is its own card, with its current values in the header and a Reset section link where going back to a default means something. See how the panels work.
The Develop tabs
Section titled “The Develop tabs”The vertical rail on the right switches between editing tools:
- Info — metadata and triage (see below).
- Transform — crop, straighten, correct perspective, rotate and flip.
- Develop — the main adjustments: white balance, tone, colour, detail and effects.
- Mask — edit selected regions independently.
- Touchup — heal, clone and remove dust or spots.
- Presets — save and apply looks.
The Info panel
Section titled “The Info panel”The Info tab shows the shot’s metadata and lets you triage it:
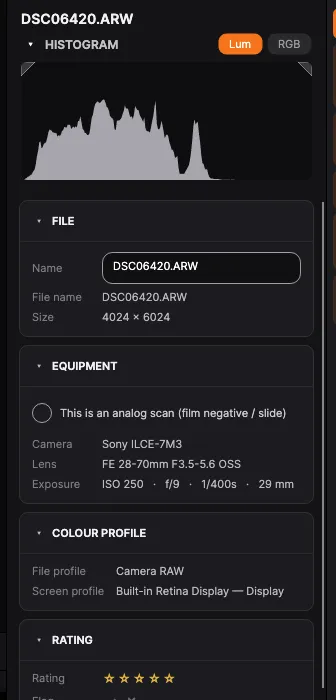
At the top is the histogram (toggle between luminosity and RGB). Its two top corners are switches: the left one marks crushed shadows in the photo, the right one blown highlights. J turns both on and off at once.
Where they mark, the picture has no detail left to recover — the shadow is solid black and the highlight is solid white in the data, whatever the preview makes of it. Blown areas are painted red and crushed ones blue, which is why the switches carry those colours. Turn one on, pull Highlights or Exposure back until the red goes, and you have recovered everything there was to recover. The marks follow every zoom and show in both comparison views, and they are only a way of looking: nothing is added to your edit, your undo history or a preset.
Below the histogram:
- Equipment — what took the photograph and, for a scan, what copied it, in one place. Camera, Lens and Exposure are read from the file’s EXIF.
- Colour — the file’s embedded colour profile (e.g. Display P3, Adobe RGB (1998), or Untagged (sRGB) when it carries none; Camera RAW for a RAW) and the profile of the monitor you’re viewing it through, so you can see what colour space the image is in and how it’s shown.
- Rating, Flag, Color label and Tags — the same triage you can do in the Library, kept in sync.
- This is an analog scan — turn this on for film scans to unlock the Film workflow and relabel the camera/lens rows as the scanning rig.
- Capture date — corrected here if needed; reset to the EXIF value with one click.
Screen colour
Section titled “Screen colour”PxlMonk shows the preview through your monitor’s own colour profile (its ICC profile), so what you see matches the photo’s real colours — and matches what other colour-managed apps show. On a wide-gamut (Display P3) screen — every recent Mac, and many Windows monitors — this keeps edits from looking oversaturated. Move the window to a second monitor with a different profile and the preview adapts to it. It also reads each file’s own embedded colour profile, whatever it is, so a Display P3, Adobe RGB or otherwise profiled JPEG, PNG or TIFF shows its true colours instead of being assumed to be sRGB.
You can override this under Settings → General → Screen colour space: choose Automatic (match the display), or force sRGB or Display P3 — useful for soft-proofing how an image will look in a fixed space.
Next steps
Section titled “Next steps”- White balance & tone — your first real adjustments.