Masking
Masks let you adjust part of a photo instead of the whole thing — darken a bright sky, brighten a face, warm up a foreground. Open a photo and click Mask in the right-hand rail.
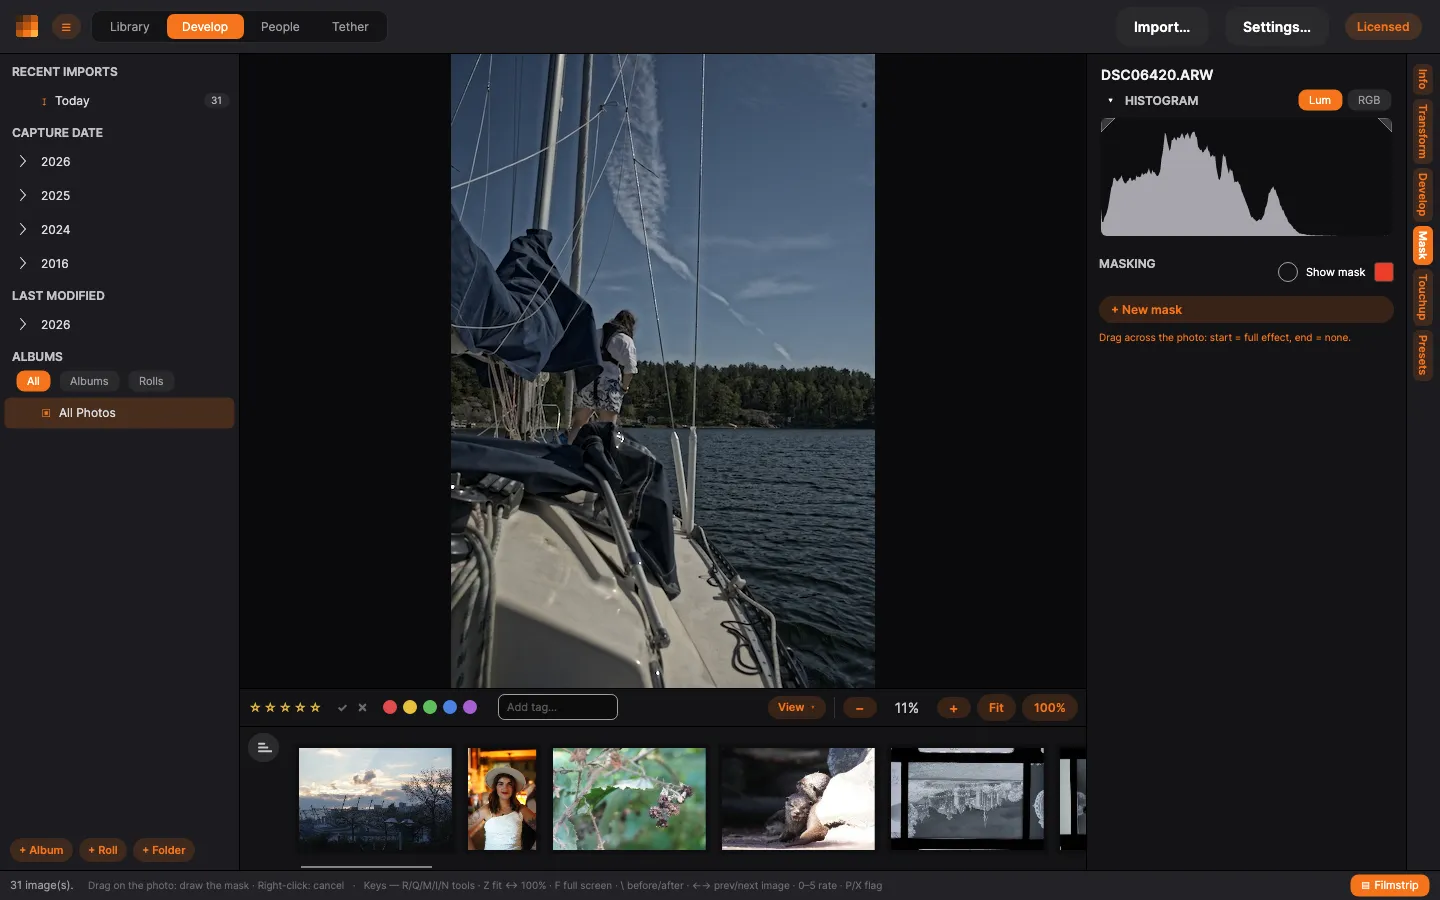
Create a mask
Section titled “Create a mask”Click + New mask and pick what the mask should select:
-
+ Linear — a linear gradient. Drag across the photo: the effect is full at the start of the drag and fades to nothing at the end.
-
+ Radial — a circular/elliptical mask; drag to place and size it.
-
Brush — paint the mask straight onto the photo by hand. A ring shows the brush size; drag over the area you want. Size sets how wide it paints — or roll the mouse wheel over the photo to resize it — Hardness how soft the edge is, Flow how strongly each pass paints, and Smoothing steadies the stroke against hand shake. Hold Alt (⌥) while brushing to erase — the ring turns red and the stroke rubs coverage back out of the mask you’re painting; let go to paint again. Selecting a brush mask picks the brush back up so you can keep working on it; right-click on the photo — or press
Esc— to put it down again without losing the mask. The stroke is kept on the picture, so it stays put when you crop or rotate afterwards.A painted mask can be rasterised into a pixel layer — the button on the layer’s row. That makes a picture of the mask on a layer of its own and switches the painted one off; your strokes stay exactly where they are, so switch it back on whenever you want to keep painting. It is worth doing for one reason: a picture is something an AI assistant can work on, while brush strokes are not. A rasterised mask lives in your library folder rather than travelling in the XMP sidecar.
Two more select by what the photo looks like rather than by where you drag. They start a mask of their own, and can also be added to an existing one:
- Brightness — everything within a range of lightness. Set From and To to pick out the highlights, the shadows or any band between, and Softness for how gently the selection ends. Leave some softness on: a hard edge draws a visible contour through the photo wherever the brightness crosses the threshold.
- Colour — click the colour you want in the photo, and everything close to it is selected. Hue rotates the colour being aimed at — pick roughly, then nudge, which is the way in when the colour you want never appears cleanly on its own. Tolerance sets how close still counts. Brightness is deliberately left out of the match, so the same red is caught in full sun and in shade — pick the car once and its shadowed side comes along.
Both carry a Radius and a Sensitivity. These are not cosmetic. A selection decided purely pixel by pixel turns photo noise into speckle — single pixels in, their neighbours out — and no amount of softening the range fixes that, because the range works on brightness while the speckle is spatial. Radius smooths the selection across the photo; Sensitivity decides how firmly that smoothing stops at real edges, so the selection stays put where the subject actually ends.
Show mask overlays the selected area so you can see exactly what it covers. The swatch beside it changes the overlay colour — handy when the default red lands on a red subject. A colour mask also shows the colour it is keyed to as a swatch.
Adjust the masked area
Section titled “Adjust the masked area”With a mask selected, its adjustment sliders appear — Exposure, Contrast, Highlights, Shadows, Temp, Tint, Saturation and Strength. They apply only inside the mask.
Below them, under Detail, come Dehaze, Clarity, Structure and Sharpen. They are the same four you know from the right-hand panel, doing the same thing to the masked area alone: clear a distant ridge without touching the foreground, put structure into a rock face and leave the sky smooth, sharpen the eyes only. Note that these four look at each pixel’s surroundings, so unlike the sliders above they cost real time — on a mask or two you will not notice, but a photo carrying several masks with Clarity or Dehaze redraws more slowly while you drag.
Combine parts
Section titled “Combine parts”A mask can be made of several parts. Under the selected mask, Add and Subtract each open the same list of kinds — so the operation and the kind are chosen in one go, and there is no mode to set first. Each part shows its own black-and-white preview and its operation as a sign: + added, − subtracted, ∩ intersected. The gear opens that part’s settings, or invert a part. This lets you build up precise selections from simple shapes.
Next steps
Section titled “Next steps”- Presets — save a look and reuse it.
- Developing your photos — back to the full editor.